Arduino Light Sensor Project Tutorial45
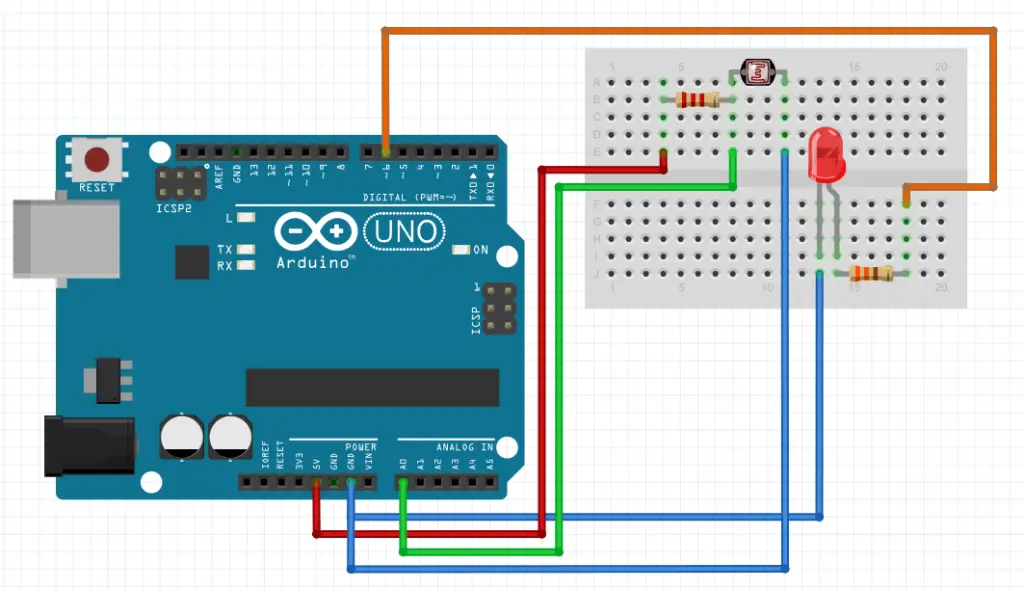
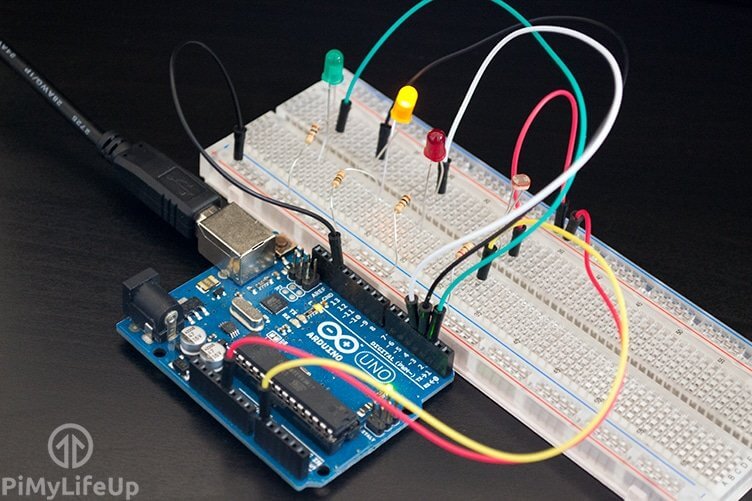
Wiring Diagram for Light Sensor Triggers and LED. Use the following wiring diagram to wire up your Arduino, LED and light sensitive resistor. Arduino PIN 3 to 220 Ohm Resistor. 220 Ohm Resistor to LED Anode (+) LED Cathode (-) to GND. Arduino PIN A0 to 10K Ohm Resistor and Photoresistor. Photoresistor to Arduino 5V. 10K Ohm Resistor to GND.

Light Sensor (Photoresistor) With Arduino in Tinkercad 5 Steps (with Pictures) Instructables
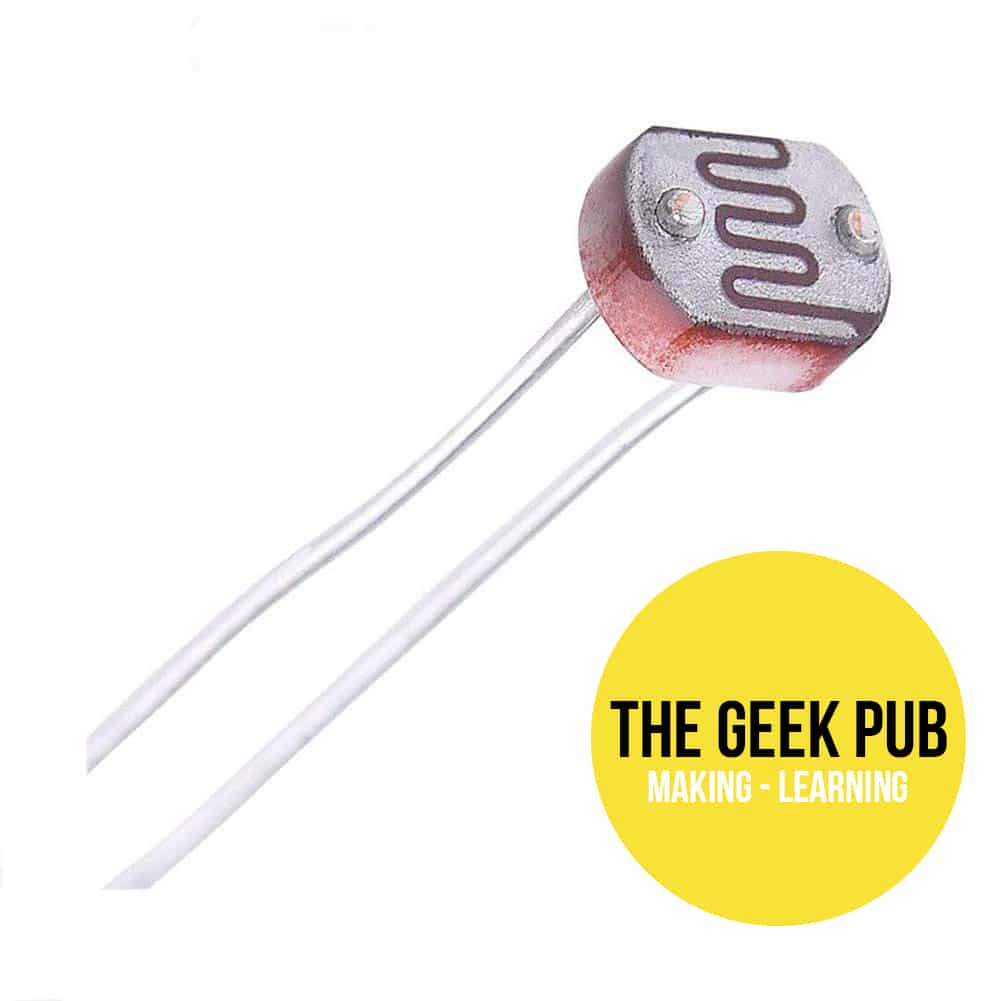
Monitoring the output of a light-dependent resistor, or photoresistor, allows the Arduino to know how light or dark it is. When the light falls below a certain level, the Arduino turns on a couple of LEDs. A light-dependent resistor, or photoresistor, is a sensor whose resistance decreases as the amount of light falling on it increases.

Arduino Sensor Hackster.io
Download the Temu App and start saving more today! Unleash incredible deals and coupons. Discover unbeatable deals and discounts on the Temu App. Download Now & Save Big!

Learn How to Setup an Arduino Light Sensor Arduino light sensor, Arduino, Light sensor
This Arduino Light sensor circuit is a simple example that shows you how to connect light sensors such as photoresistors, photodiodes, and phototransistors, to an Arduino. In this quickstart guide, you'll learn how to connect a photoresistor to an Arduino board and read out the voltage.

Light Sensor Module LDR Photo resistor Module Light Module For Arduino PI UNO eBay
Octopart offers price & stock information & comparison for electronic components. Set stock alerts on changing inventory, use BOM tool w/ auto column mapping, and more.
Arduino Light Sensor Project Tutorial45
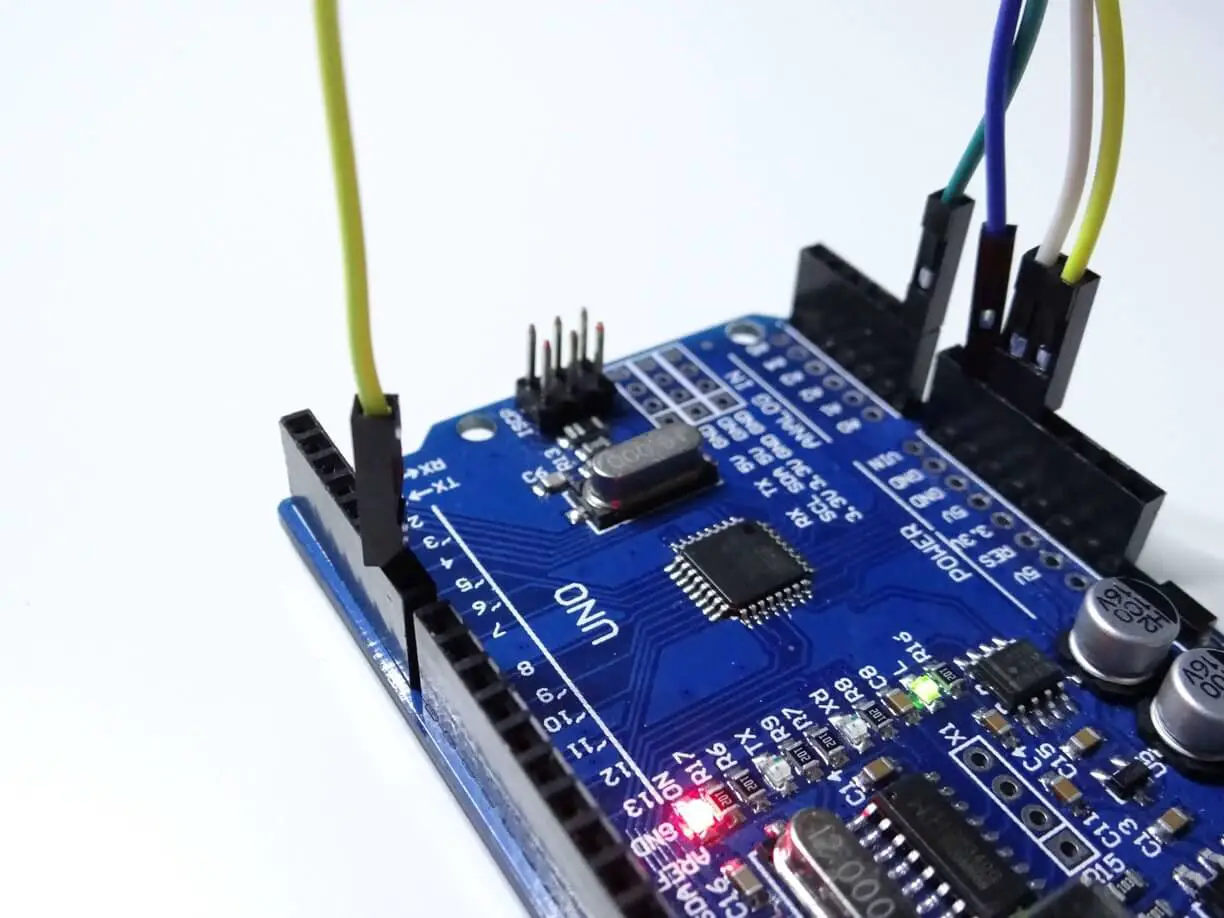
This is the Arduino Tutorial #9 - Arduino Light Detector Sensor using LDR. After understanding Arduino Push Button DigitalRead in Arduino Tutorial #8. In this blog, we going to describe What is Light Detector Sensor, What is an LDR, the Project Working Principle, the Arduino Light Detector Sensor Code/sketch, and the circuit diagram.

ESP8266 Light Sensor 4 Steps Instructables
Arduino Light Sensor Tutorial. In this Arduino light sensor tutorial we're going to show the basics of connecting a light sensor (or photoresistor) to the Arduino and reading its input. A photoresistor is a sensor that changes resistance based on the amount of light being delivered to its sensor. In this way we not only detect whether it is.

Arduino Light Sensor 4 Steps Instructables
The BH1750 is a 16-bit ambient light sensor that communicates via I2C protocol. It outputs luminosity measurements in lux (SI-derived unit of illuminance). It can measure a minimum of 1 lux and a maximum of 65535 lux. The sensor may come in different breakout board formats. See pictures below. Both images represent a BH1750 sensor. BH1750 Features
LDR sensor with Arduino Tutorial What is Arduino Light Sensor in details
A light sensor is a photoelectric device that converts light energy (photons) detected to electrical energy (electrons). Seems simple? There is more to a light sensor than just its definition. It comes in different types and is used in various applications!
Light Sensor LED Light Sensor Module for Arduino OKY3200 OKYSTAR
1. Download. This is a light sensor using Arduino to make it, it's easy and everyone can do it by yourself. It can help you sense the light Luminance wherever you are. When you are making it, first prepare the materials and build up the circuit, and then write the code and decorate it, you'll finish your working and have an Arduino light sensor.
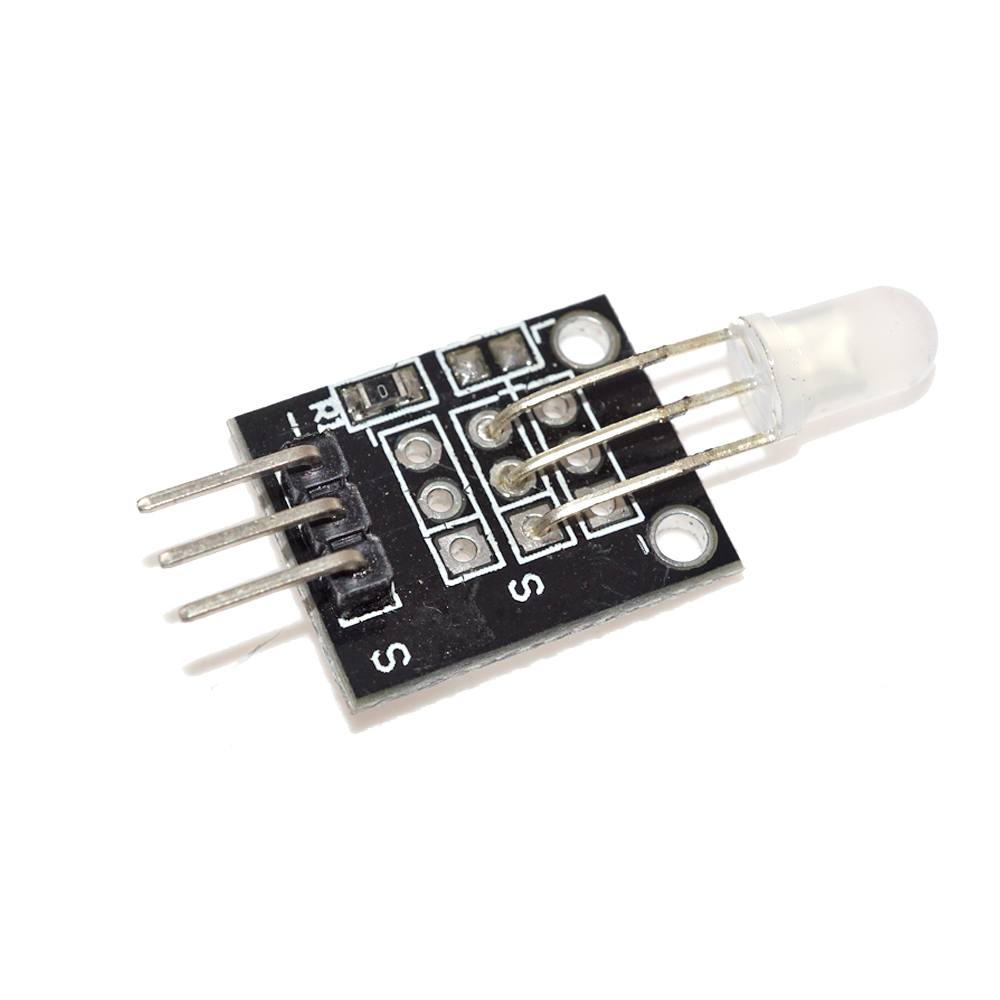
Photosensitive Diode Sensor, Light Detection Photodiode Module with Digital Output for Arduino
Step 4: Test. After building the circuit correctly and adding the code, test the project by uploading the code onto Arduino. If it doesn't work, check your circuit and code if there is something connect wrong (things to check such as if the code's analog or digital work with the circuit). 完成電路和程式碼後.
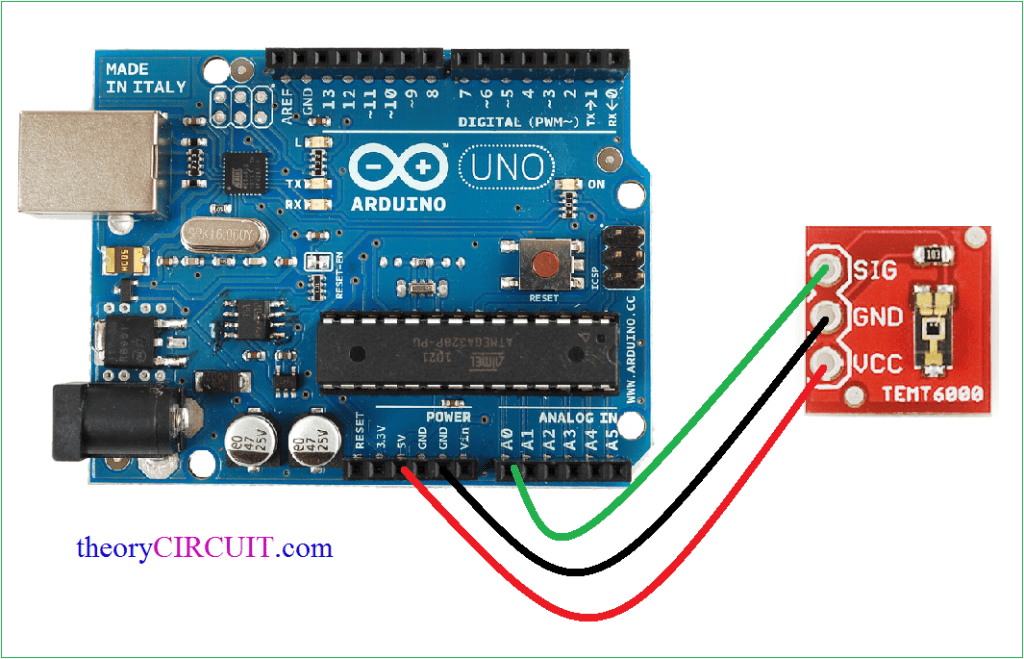
Ambient Light Sensor TEMT6000 with Arduino
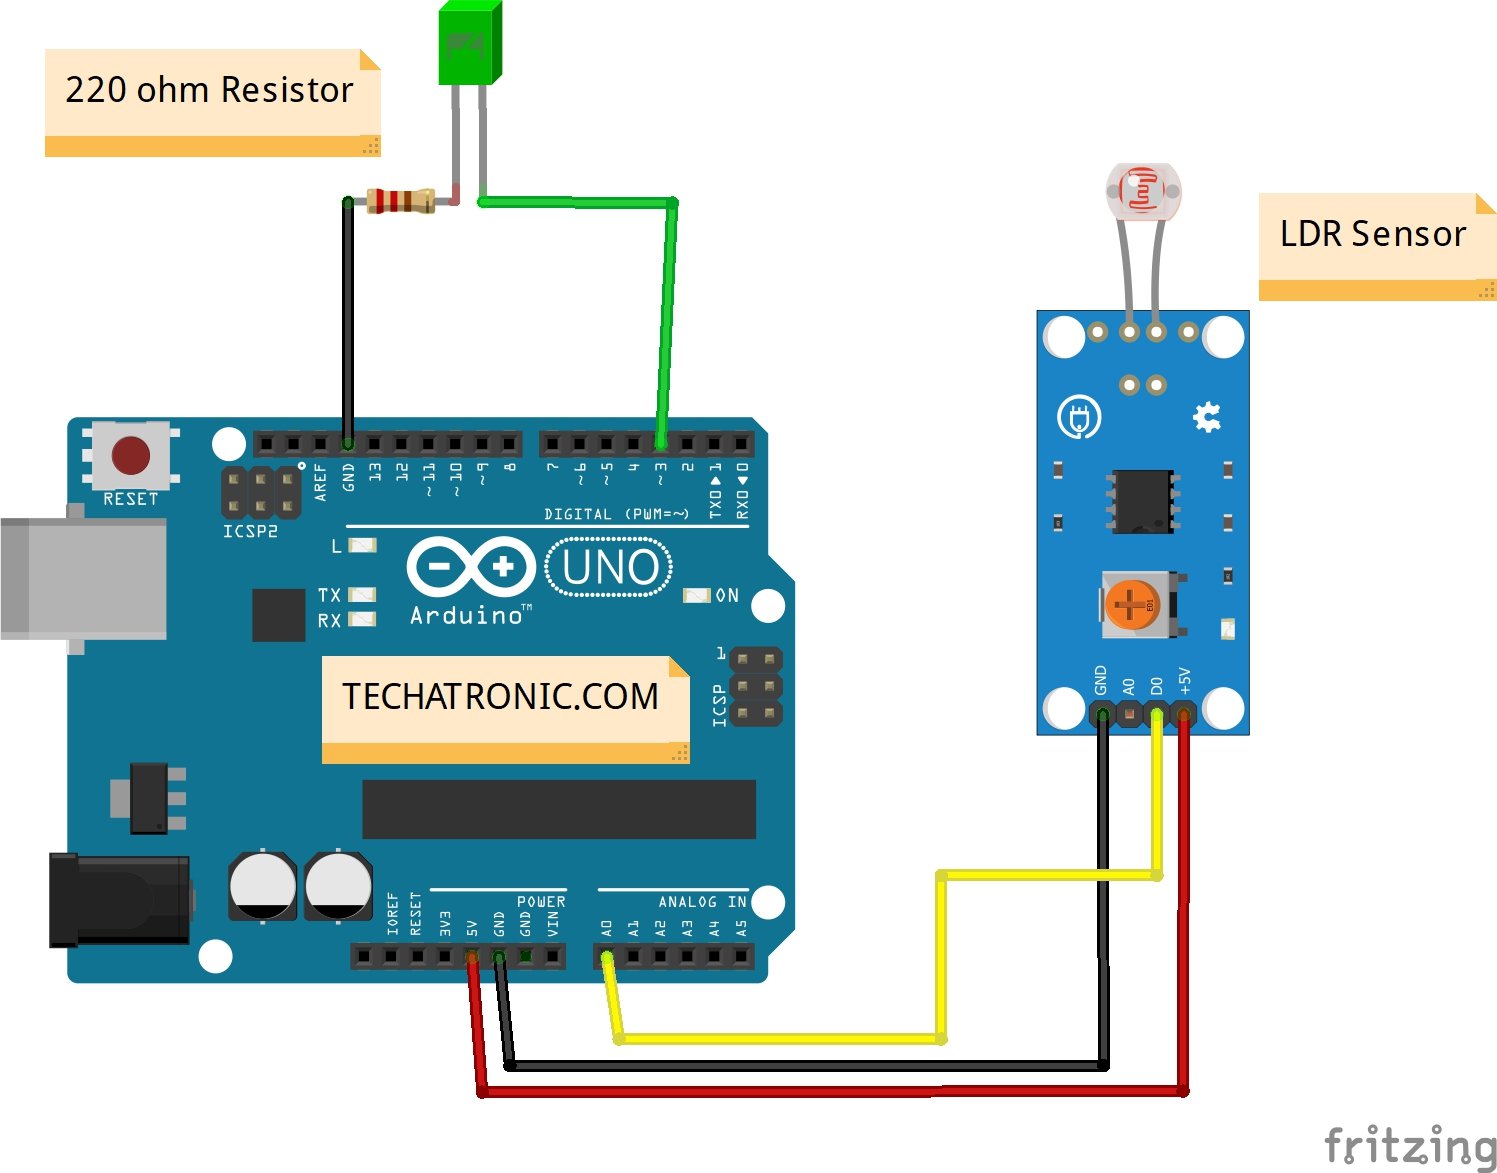
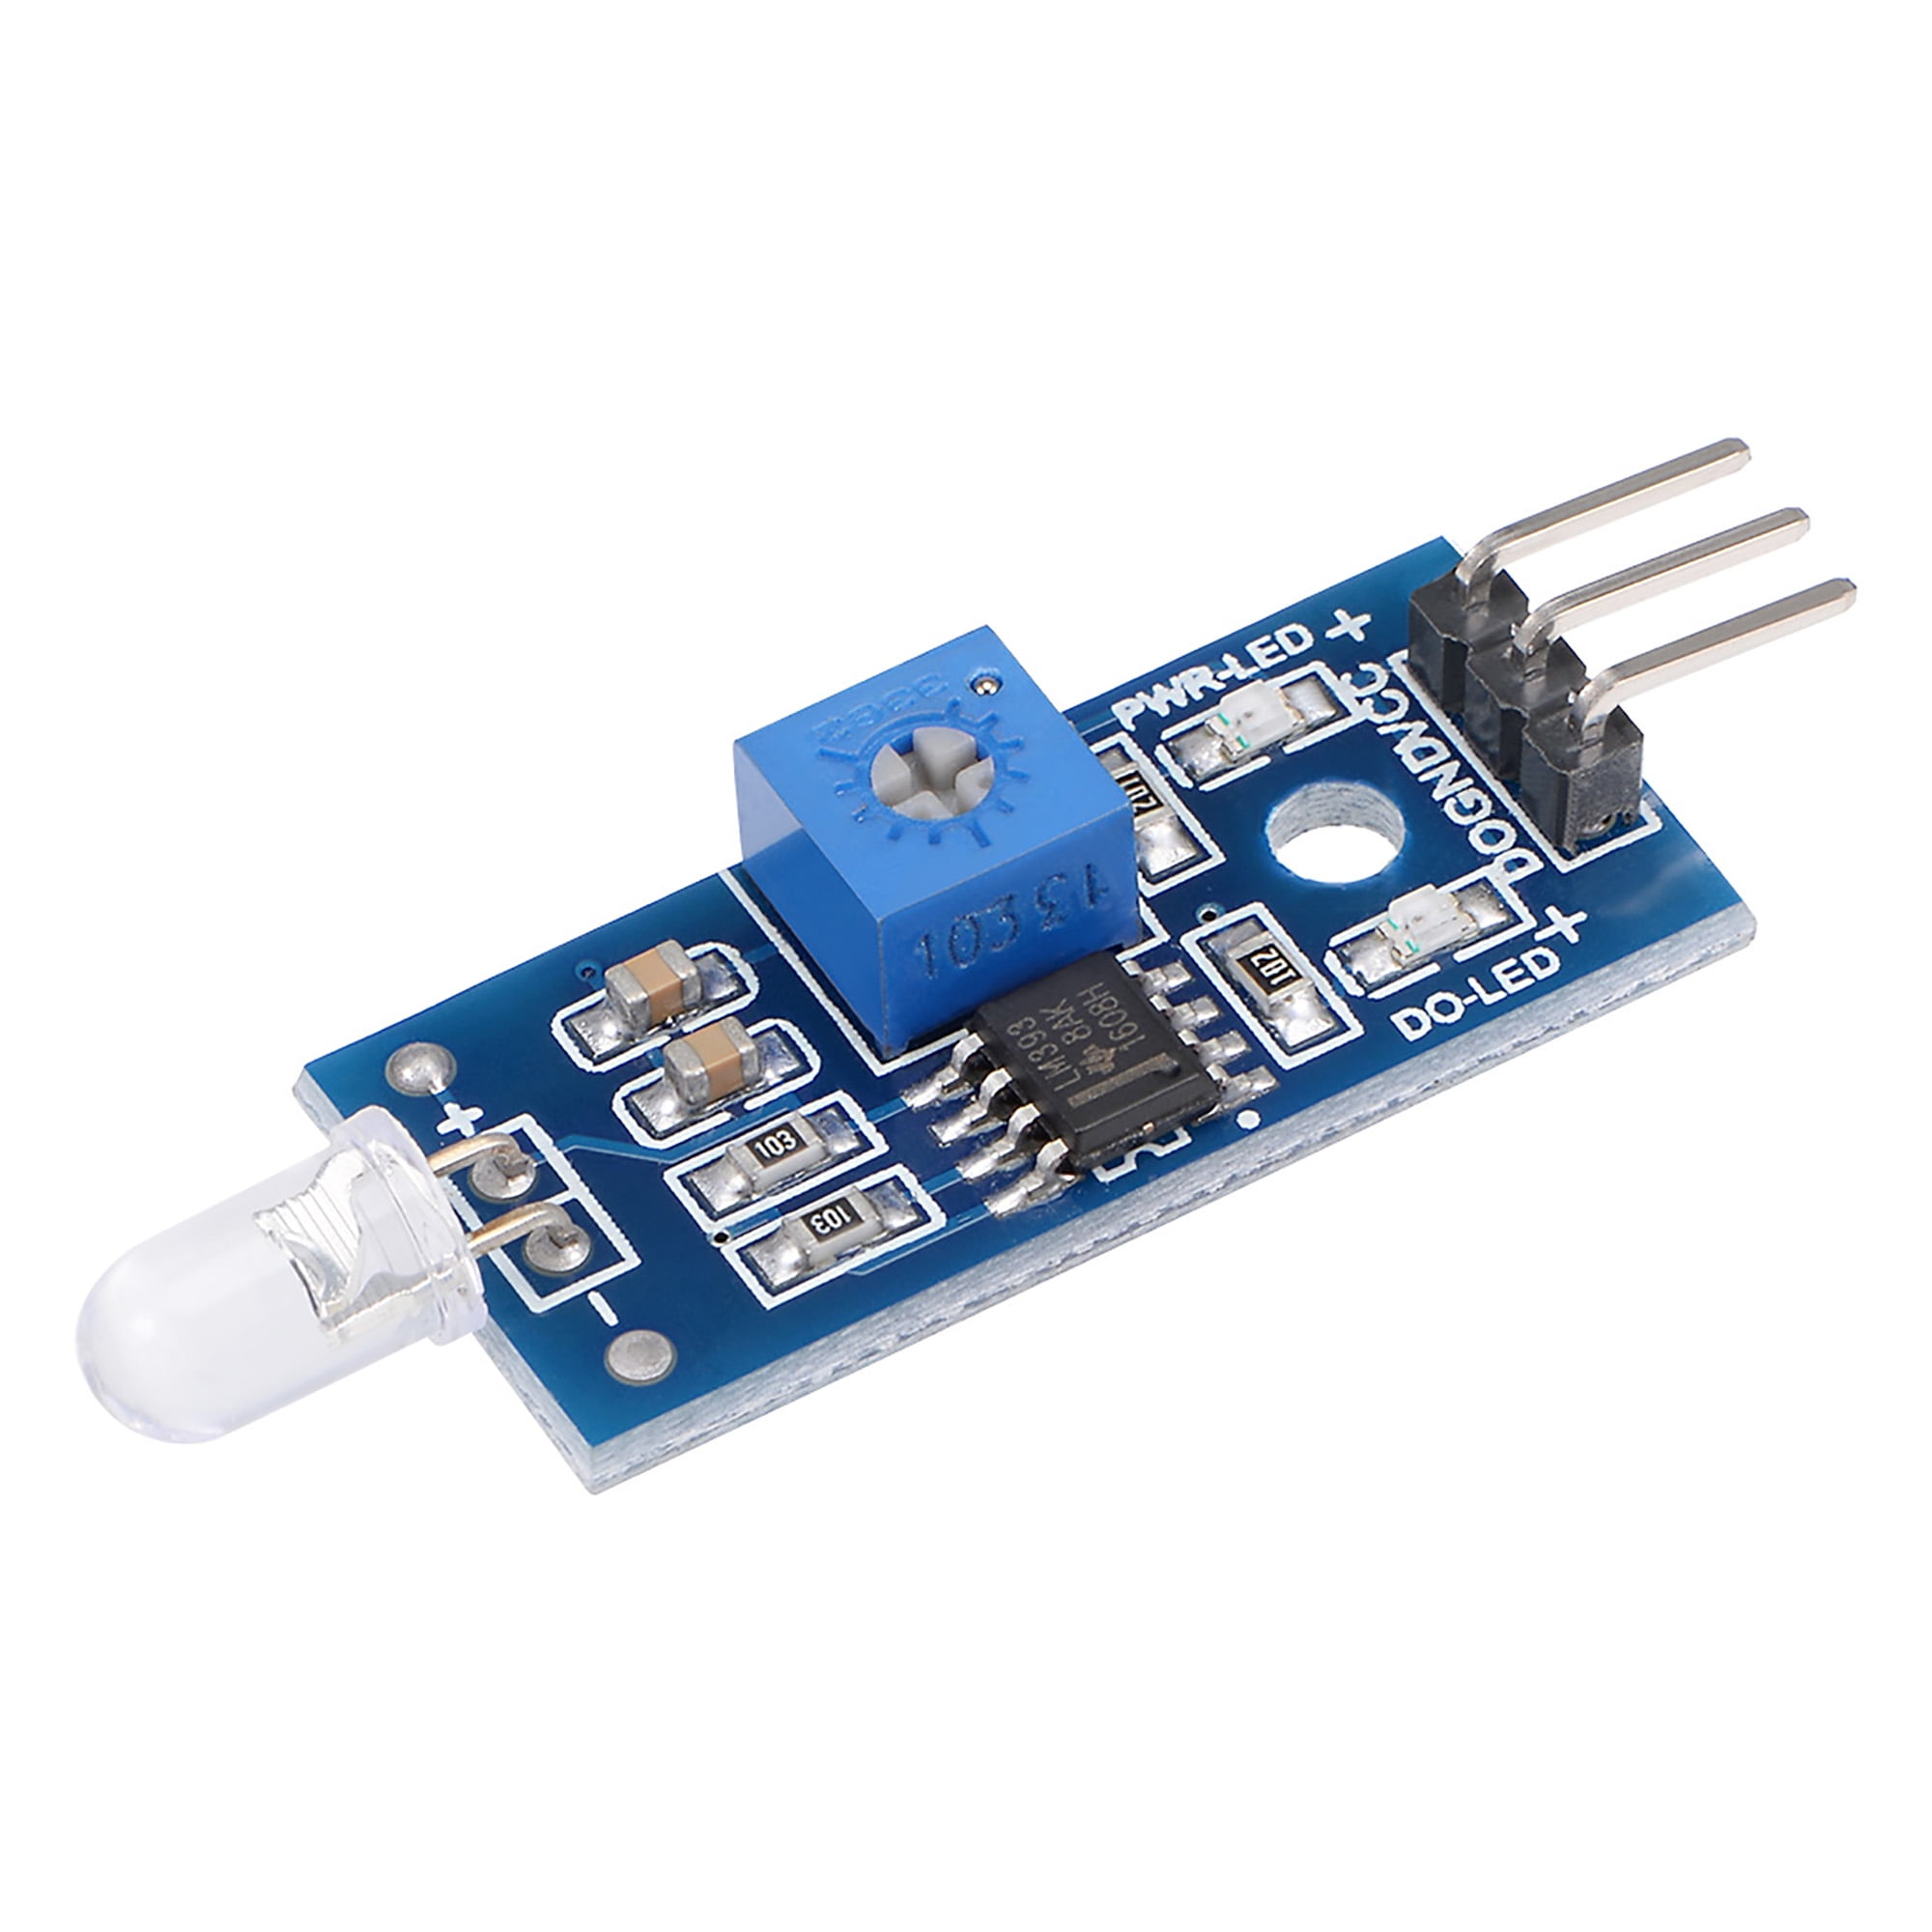
The LDR light sensor module is capable of detecting and measuring light in the surrounding environment. The module provides two outputs: a digital output (LOW/HIGH) and an analog output. In this tutorial, we will learn how to use an Arduino and an LDR light sensor module to detect and measure the light level.

Arduino Light Sensor With Buzzer and Blinking LEDs 5 Steps Instructables
Step 1: Things You Need: Hardware: 1. 1x ARDUINO UNO 2. 1x mini BREADBOARD 3. 1x LDR 4. 1x 10K resistor 5. 9V Battery:optional 6. 9V Battery clip with barrel jack:optional 7. some Wires or Jumpers 8. A LED Tools: 1.Computer with Arduino IDE Step 2: The Circut
Arduino Light Sensor using a Photoresistor (LDR) Pi My Life Up
To work with a light sensor using Arduino and Esp32, you would typically follow these steps: 1. Connect the light sensor to the Esp32 or Arduino board using jumper wires. The light sensor will have two legs, one for power (VCC) and one for the analog input (OUT). 2. In your Arduino IDE, include the necessary libraries for Esp32 or Arduino and.
Arduino Light Sensor Tutorial The Geek Pub
About Light Sensor The light sensor used in this tutorial is a photoresistor, which is also called light-dependent resistor or photocell. It is used not only to detect light but also to measure the brightness/illuminance level of the ambient light. Pinout A photoresistor has two pins.
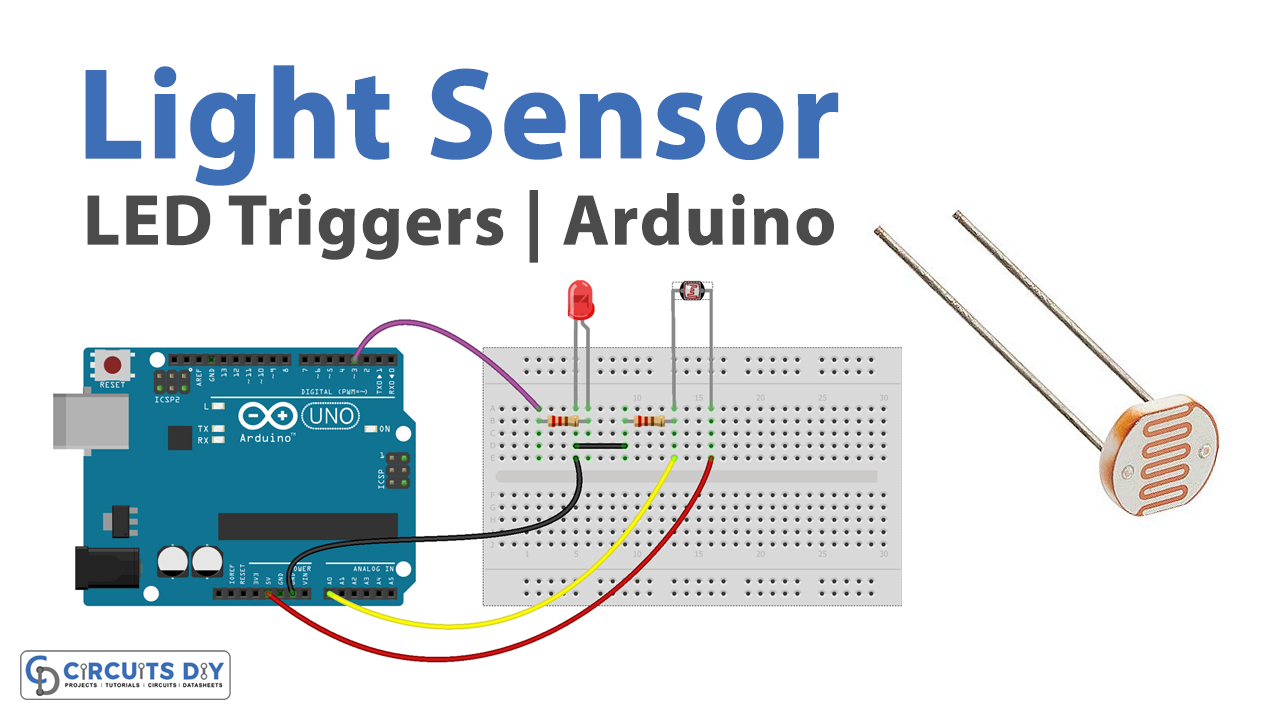
Light Sensor Triggers LED Arduino Tutorial
Arduino Light Sensor February 15, 2016 A Light Sensor is a device that detects light. It generates an output signal that is proportional to the intensity of light. A light sensor measures the radiant energy present in the wide range of frequencies in the light spectrum. Some of the common frequencies are infrared, visible and ultraviolet.
